Sertifi Data Tags Quick Reference
When using Sertifi Data Tags, refer to the following table for common data field formats.
It's important to note that when you place the data fields in your document, and then add that document to your Document Library in the Sertifi Portal, you may see the email address of the signer appear within the data tags. This is a visual cue to you, the document creator, to know who will be filling out the field. Your signers will not see the fields with an email address pre-populated.
Note
If you're adding data fields to a PDF, you must first add a text field, and then insert the Sertifi Data Field code into the name section of the text field.
Data Tag Name | Data Tag Format for Text/Word Doc | Data Tag format for Fillable PDF | Default Field Appearance (customer view) | Field appearance once signed |
|---|---|---|---|---|
Full Signature Stamp | [[SertifiSStamp_1]] | SertifiSStamp_1 |  |  |
Small Signature Box | [[SertifiSignature_1]] | SertifiSignature_1 |  |  |
Initial Box | [[SertifiInitial_1]] | SertifiInitial_1 |  |  |
Date Box | [[SertifiDate_1]] | SertifiDate_1 |  |  |
Company Box | [[SertifiCompany_1]] | SertifiCompany_1 |  |  |
Title Box | [[SertifiTitle_1]] | SertifiTitle_1 |  |  |
Custom Box | [[SertifiLG_1]] | SertifiLG_1 |  |  |
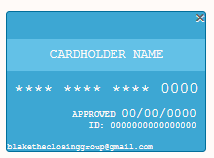
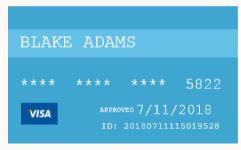
In Document Payment Authorization | [[SertifiPaymentAuth_1]] | SertifiPaymentAuth_1 |  |  |
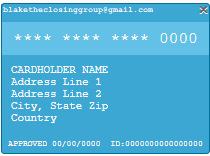
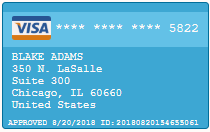
In Document Payment Authorization with address | [[SertifiPaymentAuthAddress_1]] | SertifiPaymentAuthAddress_1 |  |  |
Signer Upload | [[SertifiUpload_1]] | SertifiUpload_1 |  |  |
Data Tag Type Descriptions
Sertifi provides nine different data tags you can add to your documents.
Full Signature Stamp – you can only use a full signature stamp once per signing level to collect a signature with additional information. This data field will always collect and display the following:
Signed name (Example: Elaine Benes, Cosmo Kramer)
Signed date and time (Example: 1:45pm, 11 April 2022)
Signer's email address (Example: [email protected])
Signer's IP address (Example: 192.168.1.1)
Unique Document ID (Example: AQDbuWIl7VnZYn3XzilU493f0)
Small Signature Box – you can use this box to collect a signature as many times as you need in a document. This box displays the signed name and signer's email address.
Initial Box – you can use this box to collect a set of initials as many times as you need in a document. This box displays the signer's two-letter initials.
Date Box – you can use this box to collect the date the signer completes the document as many times as you need in a document. This box displays the date of signing.
Company Box – you can use this box as many times as you need in a document . This box displays only the company name.
Title Box – you can use this box to collect the title of the signer as many times as you need in a document. This box displays only the title of the signer. "Title", in this context, will usually mean something like a job title or position (Manager, Guest Services Agent, etc). Titles are self-selected by the participant.
Custom Box – you can use custom boxes as many times as you need in a document to collect data that's important to your document. The custom box displays whatever information you specify to collect. For instance, you can use a custom box to ask your customers if they prefer a particular kind of room, or a particular menu they want to use for an event.
In Document Payment Authorization – you can use this authorization graphic as many times as you need in a document to collect payment information from the signer. This graphic displays the following information:
Last four digits of the credit card number
Card type (Visa, Discover, etc)
Approval date
ID of the transaction
In Document Payment Authorization Address - you can use this authorization graphic as many times as you need in a document to collect payment information, along with address information, from the signer. The graphic displays the following information:
Approval date
Last four digits of the credit card number
Card type
Approval date
ID of the transaction
Address associated with the payment
Participant Upload Button (Formerly Signer Upload Button) – you can use this button as many times as you need in a document to collect required files from the participant. This is commonly used to collect materials like government-issued ID documents. Each time you add this button, the signer is required to upload at least one document. After upload, this button displays the name of the uploaded file, and the download location.