Configure or Edit Sending Page Defaults
Super Admins and Power Admins (if allowed by Super Admins) can update and make changes to the default settings for the document sending page:
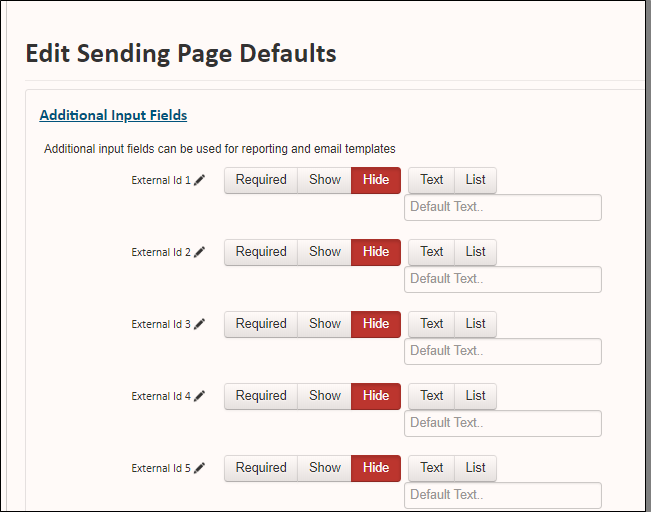
Additional Input Fields
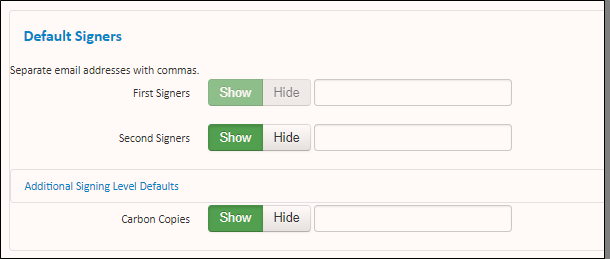
Default Signers
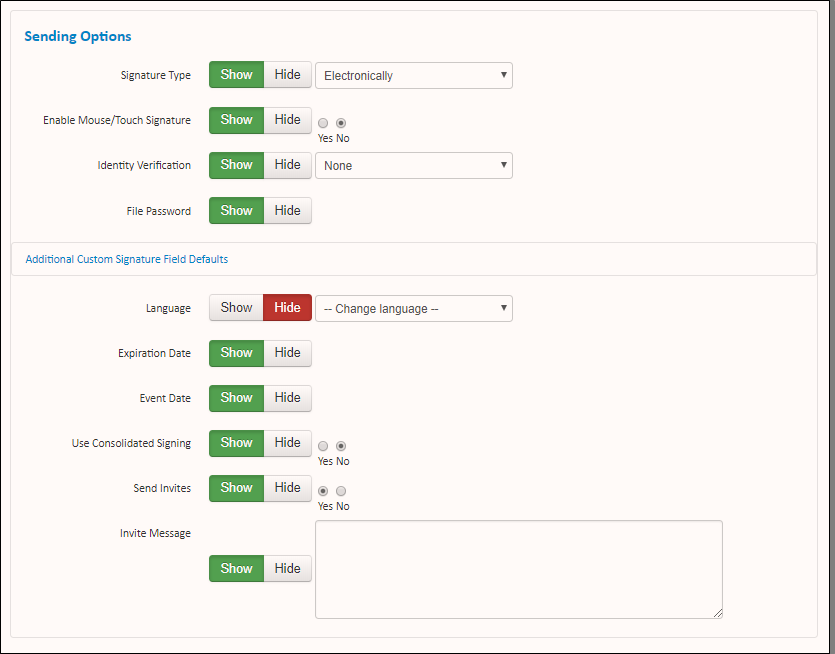
Sending Options
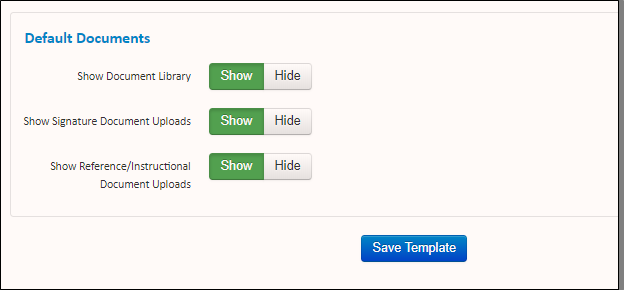
Default Documents
Additional Input Fields
You can add additional input fields to your signature documents to use in reporting or email templates. To add default input fields, click Additional Input Fields. From here, you can decide whether to show or hide the fields, as well as configuring them to be required.

Ensure that you enter either default placeholder text or a list for each field you want to add. You can add up to 10 fields.
Click Save Template at the bottom of the page to save any changes you make to this section.
Default Signers
You can create default signers that appear on all of your signature documents, or you can choose to hide additional signers on your documents. Click Show or Hide for the respective signer level you'd like to update.

Any email address entered in any field on this page will receive a copy of every document sent from your portal. Furthermore, any email addressed entered into a signing field will receive documents for signature; email addresses in the Carbon Copies field will only receive copies of documents without being able to sign them.
Click Additional Signing Level Defaults to show or hide third through tenth level signers.
Click Save Template at the bottom of the page to save any changes you make to this section.
Sending Options
You can update or enable the default Sending options for all of the files sent in the portal. This way, you can ensure that the same information is collected each time.

You can choose to Show or Hide the following fields:
Signature Type
Enable Mouse/Touch Signature
Identity Verification
File Password
Additional Custom Signature Field Defaults
Language
Expiration Date
Event Date
Use Consolidated Signing
Send Invites
Invite Message
The majority of these fields require being marked as either Show or Hide, as they can influence critical parts of the sending and signing process.
The following fields require additional selections or information outside of the Show or Hide option:
Signature Type - select from one of the following to determine the default signing method for all files:
Electronically
Print and Sign
Either Electronically or Print and Sign
Enable Mouse/Touch Signature - select Yes or No depending on if you want to enable a mouse or touch screen signature for your signers.
Identity Verification - select Question-based verification to require the signer to answer a series of questions to identify themselves.
Additional Custom Signature Field Defaults - if you have additional fields you want to add to your signature documents, click this link, and add the details for each custom field. These appear as large signature stamps on your signature documents.
Language - select the default language for the signing room.
Use Consolidated Signing - select Yes or No to enable consolidate signing for your signature documents.
Send Invites - select Yes or No to show the ability to send invitations for a file.
Invite Message - enter a default invite message to send in the invite emails for files.
Click Save Template to save any changes you make to this section.
Default Documents
In the Default Documents section, you can choose whether to show or hide the document library, signature document uploads, and reference document uploads for other Sertifi roles in your portal. Select Show or Hide based on your preferences.

Click Save Template to save any changes you make to this section.