eAuthorization Document Library
You can add frequently used signature documents and reference documents to your Document Library, letting you quickly and easily include them in the folders you send.
Note
When documents are sent via Sertifi, each page of the document receives a DocumentID stamp in the lower-left hand corner of the page to indicate that the document was processed through the Sertifi system.
Adding Authorization Documents to the Document Library
To add an authorization document to your Document Library:
Log in to your Sertifi portal.
Navigate to Administration > Document Library.
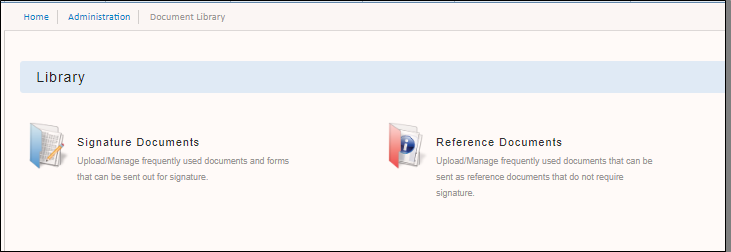
Click Signature Documents. The Signature Documents screen opens.
Click Upload to add a signature document from your machine. A popup window opens.
Enter a title for the document.
Click Choose File to navigate to the document on your machine, and then select it.
Click Upload. You can now include the signature document in files you send to your clients.
When you upload a signature document to the Document Library, the document is private by default, which means that only you can view it.
Adding Reference Documents to the Document Library
You can include reference documents in the folders that you send to your clients. Reference documents can include any support materials, like a set of instructions on how to complete the authorization form, or important information like venue maps or catering menus. Note that reference documents don't require a signature or authorization, but are most commonly used to supplement the authorization form in some way.
To add a reference document to your document library:
Login to your Sertifi portal.
Navigate to Administration > Document Library.
Click Reference Documents. The Reference Documents screen opens.
Click Upload to add a reference document from your machine. A popup window opens.
Enter a title for the document.
Click Choose File to navigate to the document on your machine, and then select it.
Click Upload. You can now include the reference document in files you send to your clients.
Caution
When you upload a reference document to the document library, the document is private by default, which means that only the person who uploaded the document can view it.
Document Options
After uploading an authorization or reference document, you can view and update certain aspects of it.
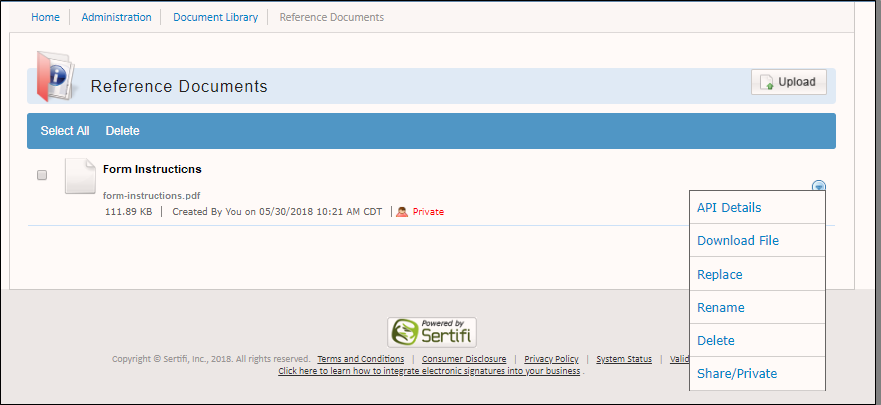
To view the document's ReferenceDocumentID as generated by the Sertifi API, click the blue arrow on the right, and then click API Details.
You can also perform the following actions on a reference document:
Replace the document
Rename the document
Delete the document
Change the document's share permissions to Share or Private. If the document is set to Share, then other users in your portal can attach it to the files they send for signature. If the document is set to Private, only you can send it.