Standard Installation Guide
The standard installation process for Salesforce for Amadeus can be completed in four steps.
Downloading and installing the Sertifi app
To download and install the app to your Salesforce account:
Request the appropriate download links from your Sertifi Customer Success Manager.
Click Install in Production or Install in Sandbox, depending on where you want to install the Sertifi app.
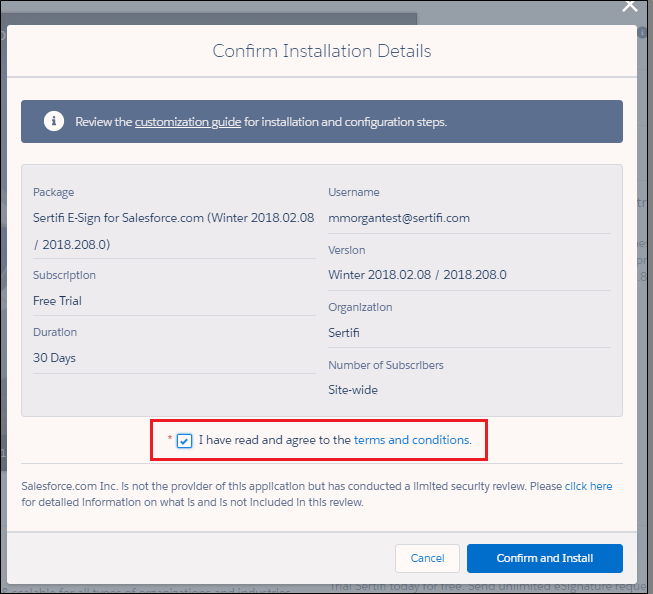
Select that you agree to the Terms & Conditions in the Confirm Installation Details popup.
Click Confirm and Install. You’re taken to your Salesforce instance.
Click Install for All Users, and then click Install. A popup appears.
Select Yes, grant access to these third-party web sites, and then click Continue.
Select Yes for 3rd party access, and then click Continue. Sertifi appears in your Installed Packages section.
If your installation ends up taking longer than expected and you need to step away for a little while,you'll receive an email when installation is complete.
Customizing your settings
Note
This step is optional; however, you may find it useful to tailor your Salesforce workflow to your exact needs or preferences.
By default, Sertifi enables key custom settings out-of-the-box with the app. If you want to further customize these settings, contact your Customer Success Manager for more details.
To add custom settings:
Enter Custom Settings in the Quick Find search bar from your Salesforce account.
Click Custom Settings.
Click Manage next to Sertifi Application Settings.
Click New to create a new custom setting, or click Edit to edit an existing custom setting.
Configure your custom settings. Refer to the Custom Settings guide for more information.
Caution
Make sure to enter sertifisem.UpdateNotificationsHandler in the UpdateMethodName setting. This is required to automatically create transactions when payments are received.
Once you finish configuring your custom settings, you can create the page layouts.
Creating a custom Sertifi button
To create a custom button:
Navigate to Create > Objects.
Click the name of the booking object.
Navigate to Buttons, Links, and Actions in the booking object.
Click New Button or Link.
Complete the following fields with the corresponding values:
Label - enter Sertifi E-Sign
Name - enter Sertifi E-Sign.
Display Type - select Detail Page Button.
Behavior - select Display in existing window with sidebar.
Text box – enter the following:
/apex/sertifisem__CreateSignatureRequest_Booking?objectID={!nihrm__Booking__c.Id}&FileName={!nihrm__Booking__c.Name}&CustomSettings=NameofObjectBe sure to enter the name of the object at the end of the apex code (e.g. after the equals sign) with the field you use to direct to the property in Salesforce.
Select the functions you want to automate by using the parameters provided in the parameter table. Your final string should appear similar to the following:
/apex/sertifisem__CreateSignatureRequest_Booking?objectID={!nihrm__Booking__c.Id}&FileName={!nihrm__Bo oking__c.Name}&customsettings={!nihrm__Booking__c.nihrm__LocationId__c}&1stSigner={!nihrm__B ooking__c.nihrm__BookingContactId__c}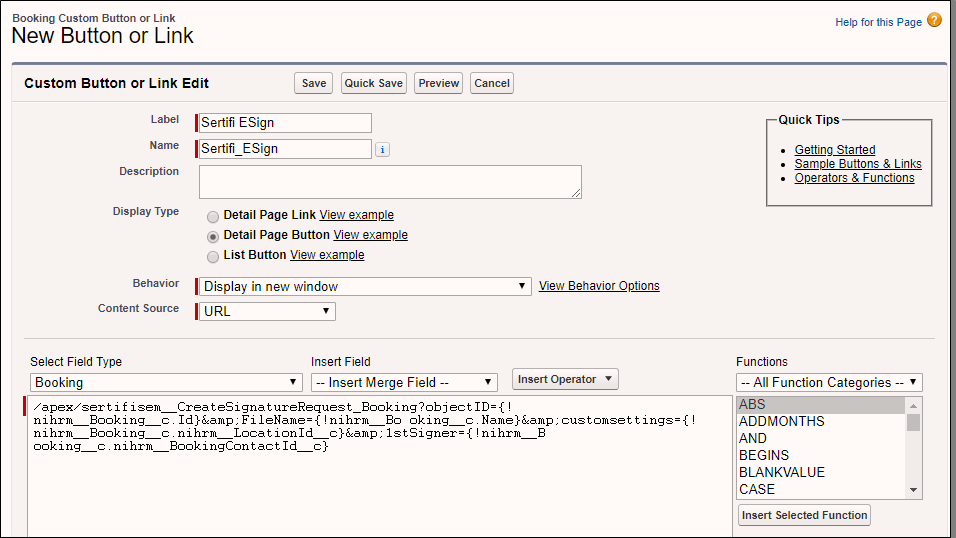
Save the button.
Add your button to your page layout.
Parameter Code | Parameter Definition |
|---|---|
&filename= | Sets the Sertifi file name |
&1stsigner= | Sets the first level signer. You can use an email field or Contact ID to set the signer. |
&2ndsigner= | Sets the second level signer. You can use an email field or Contact ID to set the signer. |
&3rdsigner= | Sets the third level signer. You can use an email field or Contact ID to set the signer. |
&4thsigner= | Sets the fourth level signer. You can use an email field or Contact ID to set the signer. |
&5thsigner= | Sets the fifth level signer. You can use an email field or Contact ID to set the signer. |
&CCsigner= | Adds a carbon copy. You can use an email field or Contact ID to set the CC recipient. |
&customsettings= | Sets which Sertifi application setting record to use. |
&ResourceGroup= | Sets the email group. Contact Sertifi support to enable email groups. |
&salesforcefolder= | Sets the Salesforce document folder. Note: Use the document folder ID, not the folder name. |
&fileexternalid1= to &fileexternalid10= | Sets External Ids 1 through 10. You can use these ids as a token to customize your email templates. Set the tokens as: {FileExternalID1} – {FileExternalID2} |
&redirecturl= | Sets a URL the signer is redirected to after signing a document. |
&attachmentID= | Attaches a signature document automatically. Document library file names must include .pdf or .doc. You can pass multiple IDs to attach multiple signature documents by separating the IDs with a comma. Example: contract.pdf, menu.doc |
&RefAttachmentID= | Attaches a signature document automatically. Document library file names must include .pdf or .doc. You can pass multiple IDs to attach multiple signature documents by separating the IDs with a comma. Example: contract.pdf, menu.doc |
&AttachFrom= | Sets which notes and attachments to display. Enter a comma separated list of record IDs for this parameter. |
&AutoAdvance=True | Enables the the one-click process. You must add at least one signer and either a payment or document for this parameter to function properly. |
&ReturnTo=SContract | Takes the sender to the EContract record after the sending process is complete, instead of taking them to the parent object. |
&ReturnTo=InPersonAuto | Takes the sender to the in-person signing page after sending instead of the parent object. |
&ExpireFolderOn= | Prefills the expiration date (either by date or DateTime rounded to the closest hour) in the wizard sending process. Note: you can't use this parameter if also using the one-click process. To format for DateTime, you must follow the formula of yyyy-mm-dd hh:mm:ss. For example: &ExpireFolderOn={!YEAR( TODAY()}{!MONTH( TODAY() ) }{!DAY (TODAY() )}{!HOUR( TIMENOW()}:{!MINUTE( TIMENOW() )}:{!SECOND( TIMENOW() )}For date, you must follow the formula of &ExpireFolderOn= { !TODAY () + whole number} For example, if you want to auto expire a folder after 7 days, your formula would appear as: &ExpireFolderOn={!TODAY()+7} |
&paymentname= | Sets the Sertifi payment name. |
&paymentamount= | Sets the payment amount. |
&paymentDueDate= | Sets the payment due date. |
&ApplyOwnersSignature=true | Applies the sender's signature as soon as the request is sent. You must add the sender's email as a signer in the file, and select Show Apply Signature in the application settings. |
&EnableIDCheck=true | Creates the ability to manually select for your signer if you want to enable the ID check. Select this box, and then when the signer accesses the document, they must complete the ID check. |
&EnableIdCheckfor= | Gives you the ability to automatically assign a signer for the ID check. Using this parameter, the wizard shows your signer and ID check as preselected. |
&EventDate= | Sets the event date. This must follow the formula of &EventDate= { !TODAY () + whole number} For example, if the event takes place in 7 days, your formula would appear as: &EventDate={!TODAY()+7} |
&paymentoperation= | Sets the payment type for authorizations. To use for authorizations, enter &paymentoperation=authorize. Note: using this parameter also requires &paymentamount to be set to 0. |
Adding the Sertifi Button
After you create your custom settings for your Sertifi app and you create your custom button, you must add the newly created Sertifi E-Sign button to the Page Layout of the object for which you configured Sertifi. If you don't add this button to your page layout, no one will be able to use Sertifi to send documents.
Note
If you set up Sertifi on a custom object, the Sertifi Related List will already be present on the page layout.
To add the Sertifi button:
Enter Page Layouts into the Quick Find search bar from your Salesforce account.
Click Page Layouts under the object name where you installed your Sertifi app.
Click Edit next to the object name.
Select Buttons in the object layout card.
Click and drag the Sertifi E-Sign button where you want the button to appear.

Navigate back to the top of the page, and then select Related Lists in the object layout card.
Click and drag the Sertifi EContracts list where you want the list to appear.
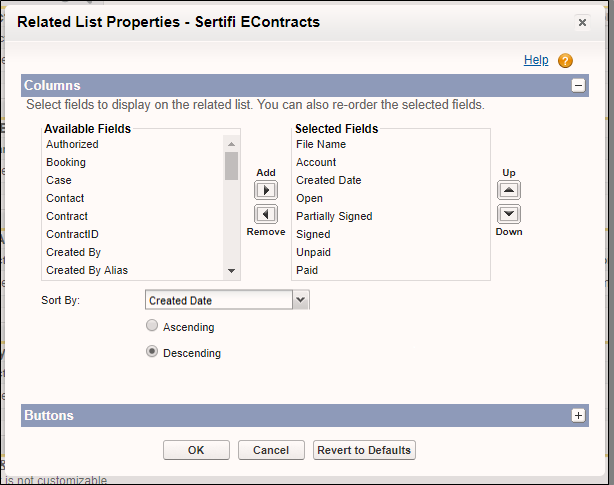
Click the wrench icon

Add and/or remove any fields you want to appear on the Sertifi E-Sign related list.
Select File Name from the dropdown menu, and then click Descending.
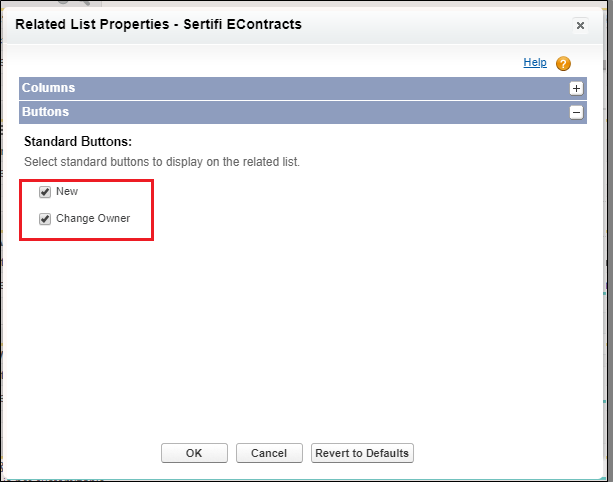
Click + in the Buttons section.
Deselect New and Change Owner.
Enabling Real Time Updates
Note
This step requires Super Admin-level access to your Sertifi portal. If you haven't already, contact your Customer Success Manager to create you as a Super Admin, or contact [email protected] to make this request.
By enabling real time updates, your sent files are automatically pushed to your Sertifi portal for storage.
To enable real time updates:
Log in to your Sertifi Portal using the URL you created when setting up your app in Salesforce.
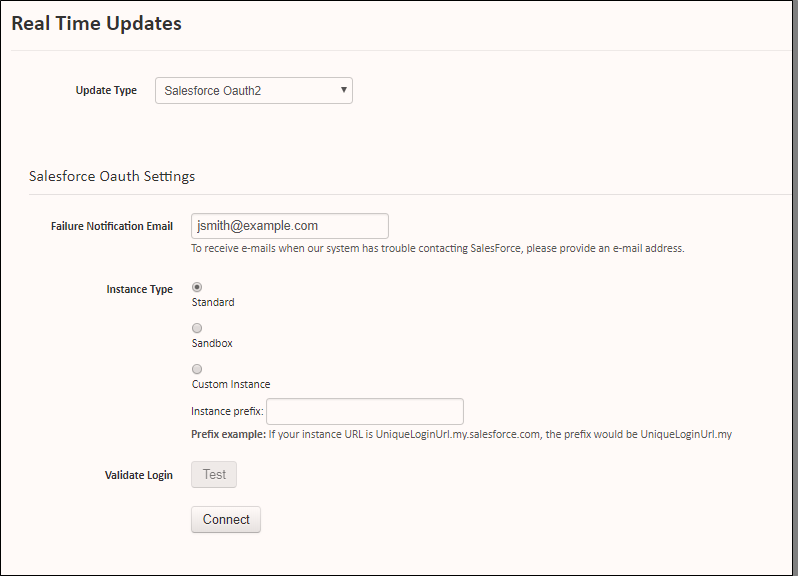
Click Administration > Real Time Updates.
Change the update type to Salesforce OAuth2.
Enter an email address in the Failure Notification Email field.
Select the Instance type, and then click Connect. A new tab opens.
Enter your Salesforce credentials.
Click Allow.
Note
When you first log in to your Amadeus account in Salesforce after setting up real time updates, you'll receive a prompt asking you to allow Sertifi access. Click Allow to finish the setup.
You’ve successfully installed and set up your Sertifi app for Salesforce. You’re taken back to your Sertifi Portal and now see a green bar stating Connected.