Folder Maintenance
On the Folder Maintenance page, you can manage files and perform various maintenance tasks. Common maintenance tasks include:
Sign the Document
To sign the signature document(s) in the folder, click the green Sign Now button to the right of the document name.
For a more comprehensive overview of the signing experience, refer to our guide.

Note
You'll only see the option for signing a document if your portal account is assigned as a counter-signer to the document. Otherwise, this option will not appear.
Add or Edit Signature Locations and Prefill Fields
You can add, edit, or remove any signature locations by clicking the orange icon to the right of the document name.

Remove, replace, or expire documents
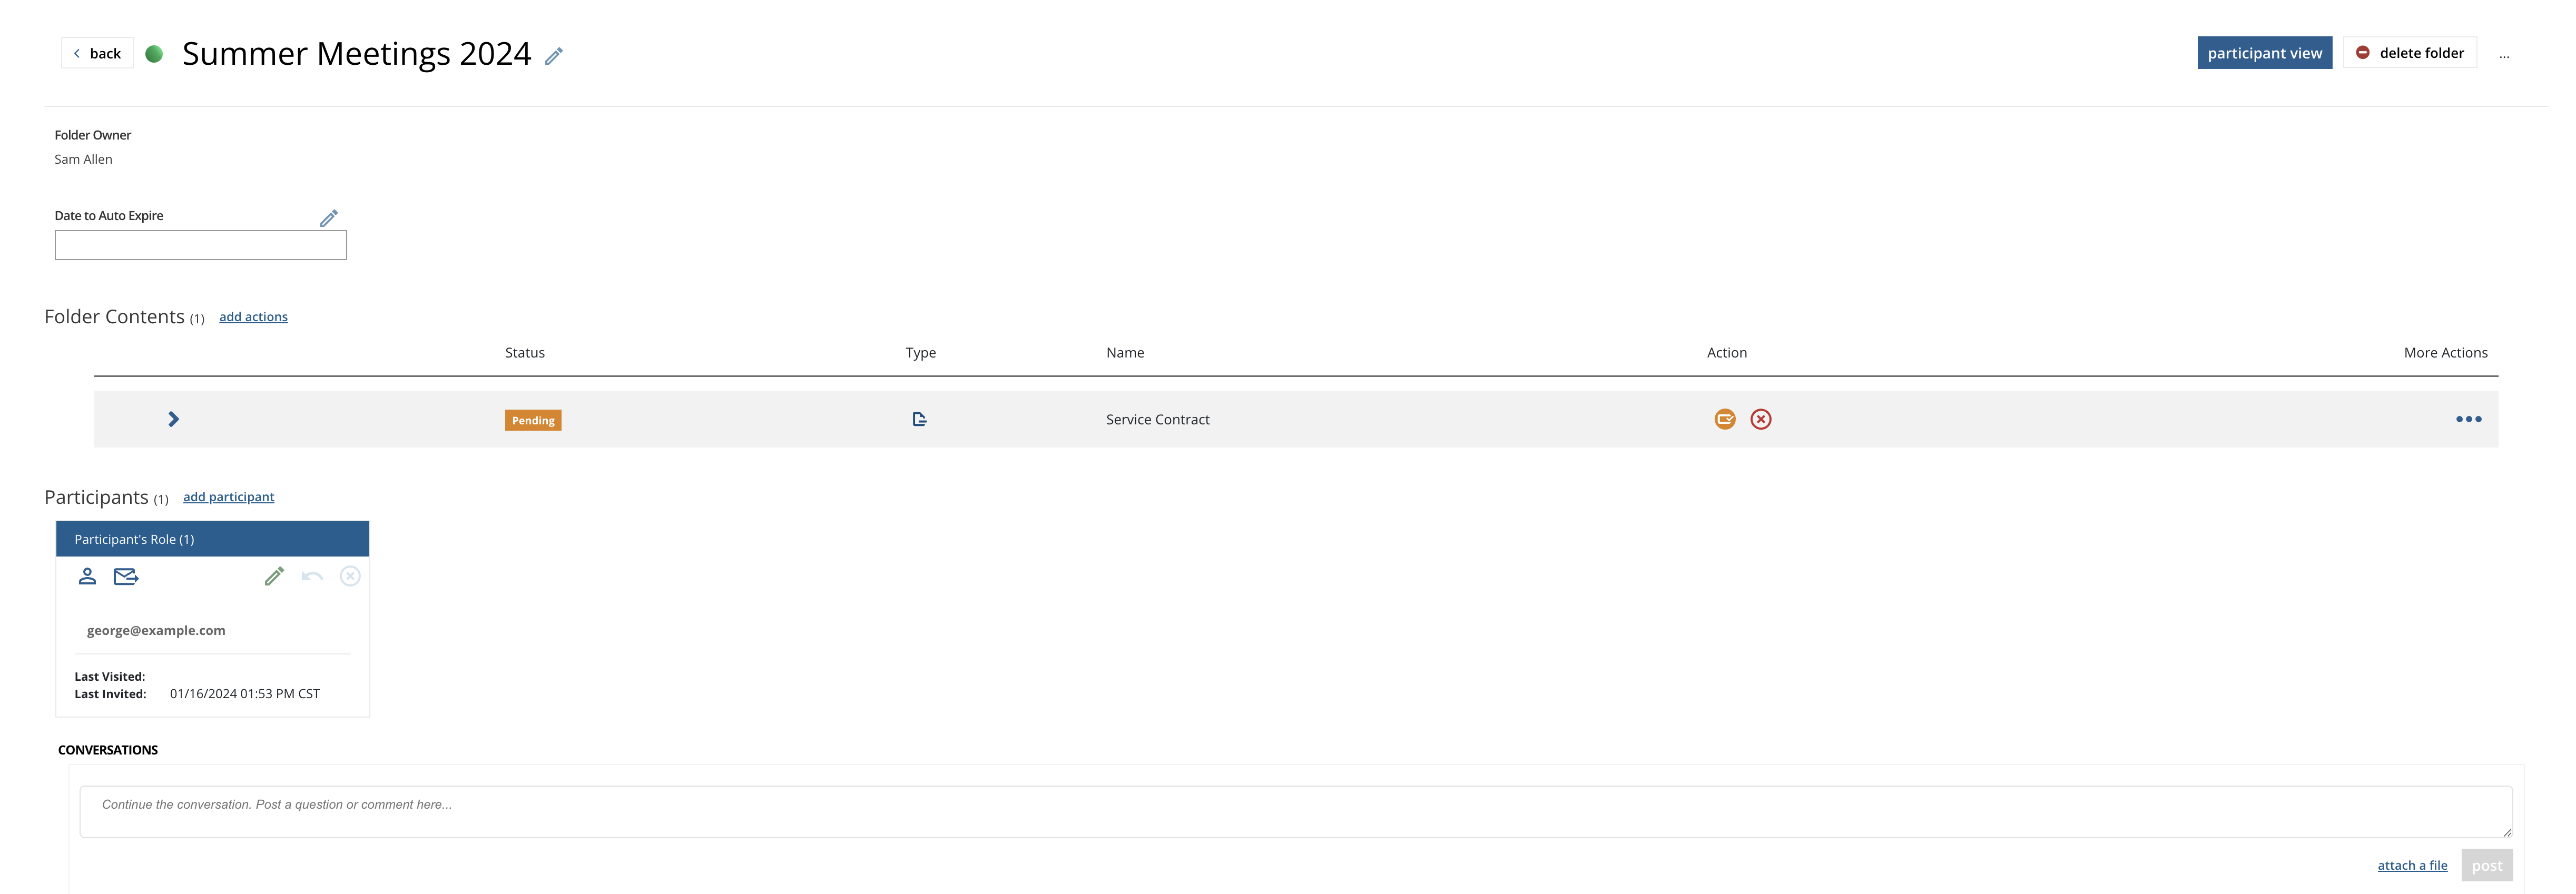
To remove a document from the folder, click the red X circle icon  to the right of the document name.
To replace or expire a document, click the blue ellipsis icon  to the right of the document name. From there, select whether to replace or expire the document.
If you're replacing the document, you can choose to upload a new document in its place, or use one from your portal's document library. You can also give the new document a new title, as well as transferring all the existing signature field locations from the old document.

Caution
Signature fields will only be preserved if the number of pages in the new document are equal (or greater) to the number of pages in the document being replaced.
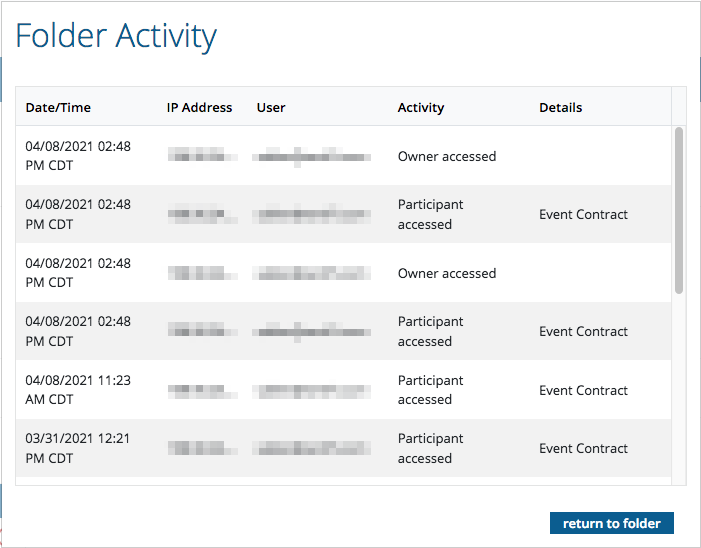
Resend e-Invitations/Review Folder History
You can review a folder's history by clicking on the ellipsis button in the top right corner of the File Maintenance page, and then clicking View Folder Activity. This menu can also be used to resend invitations, or to expire the entire folder.
To resend invitations, click the ellipsis button in the top right corner of the File Maintenance page, then click Resend Invitations.
Note
Invitations can only be re-sent to participants currently eligible to sign the document, as determined by their participant level (1st, 2nd, 3rd, etc.)
Example: Paul is a 1st level participant, George and John are 2nd level participants, and Ringo is a 3rd level participant. If Paul hasn't signed, only he can be re-invited to sign. Once Paul has signed the documents, George and John can then be re-invited to sign. After George and John have both signed the document, Ringo can then be re-invited to sign.
View Folder Certificate
A folder's certificate lets you view the history of the folder, as well as key information like signer contact information, document names, signature records, and more. To download the folder certificate PDF, click the ellipsis button in the top right corner of the File Maintenance page, then click View Folder Certificate.

Workflow Statuses
You can instantly see the status of a signature workflow by looking at the icon in the Status column next to the document's name.

The Pending status indicates that no action has been taken on the document.
A Signed status indicates that all participants have signed the document.
You can also see the workflow statuses of individual participants:
 A blue person icon is the default status; this means the participant has been added to the workflow, but has not taken any action.
 A green person icon means the participant has completed their required tasks.
Change Folder Expiration Date
To change the folder's expiration date, click on the blue pencil icon next to the current expiration date. Choose a new expiration date and time, then click the green checkmark to confirm.
Warning
Expiration dates are enforced according to the designated time zone of your portal (CST, EST, GMT, etc). Keep this in mind when setting expiration dates for folders.
For instance, a folder set to expire at 7pm CST would expire at 8pm EST, 5pm PT, and so on.
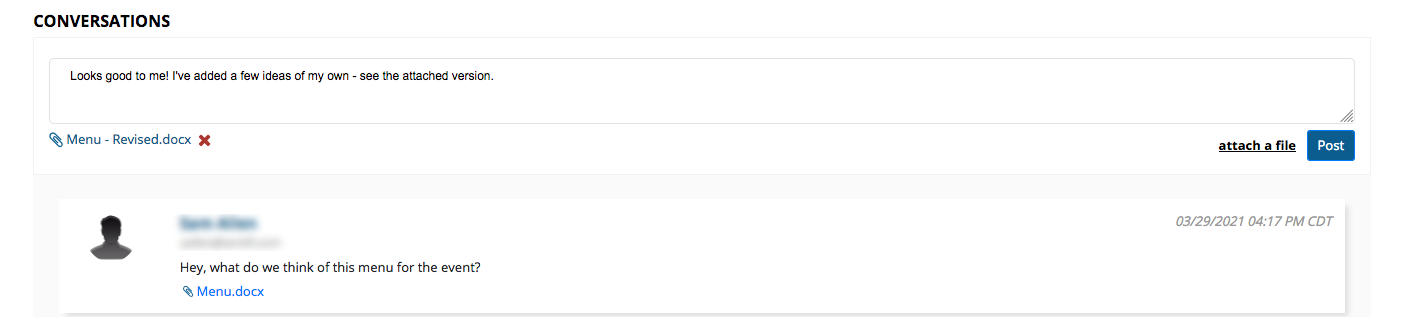
Add Comments and Attachments
To add comments and upload attachments to the folder, Scroll to the bottom of the folder page, and enter what you'd like to say into the text box. To upload an attachment, click Attach File; you can then drag-and-drop the file to attach it. When you're ready to post your comment and attachment, click Post.
Delete Folder/Archive Folder
To delete the folder, click the Delete Folder button in the top right corner. If one or more of the documents have already been signed, folders cannot be deleted – instead, they can only be archived. In this case, the Delete Folder will become the Archive Folder button.

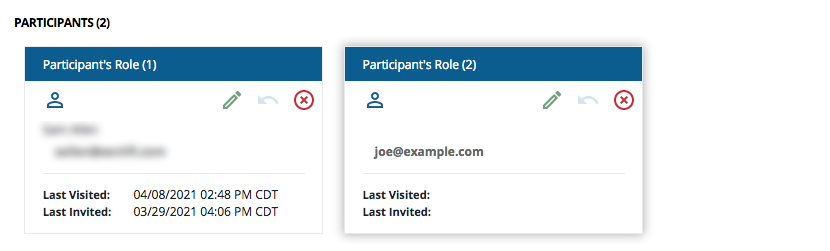
Add/Remove/Edit Participants
You can add, remove, or edit participants right from the Folder Maintenance page.
To add a participant, click the Add a Participant button on the left. In the window that pops up, enter your participant's email address, and designate a participant number for them (1st, 2nd, 3rd). If the participant does not need to sign the documents, you can designate them as a CC. Click Add when you are finished. By default, participants are notified immediately after they are added to the workflow. To disable this, uncheck the Send Invite Immediately box before adding the participant.
To edit a participant, click the green pencil icon. This will allow you to edit their email address. When you are finished updating their email address, click the green checkmark to confirm the changes.
To remove a participant, click the red circle icon. A window will pop up asking you to confirm the removal.
Warning
If you remove a participant, all of their signing locations will also be removed. When replacing a participant, it's recommended to edit an existing participant instead of deleting one and creating them anew.
Access a participant upload

If you sent an upload request with a signature document, you can access the file your participant upload by clicking the green upload icon next to the document name.
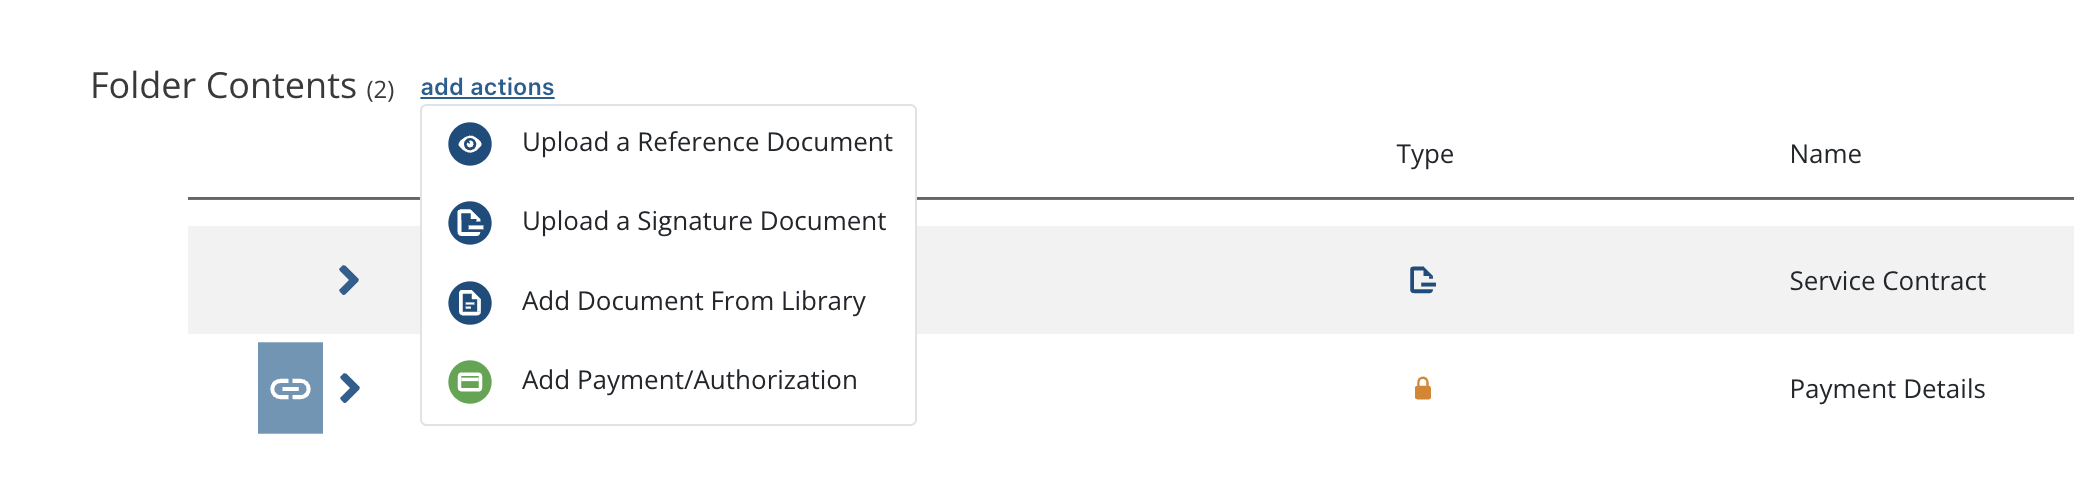
Add a new signature document, reference document, payment, or authorization
After you've sent a document for signature, you can add another signature document, reference document, payment request, or authorization request by clicking Add Actions next to Folder Contents.