Create a Payment
With Sertifi Payments, you can add payments or authorizations to your folder when you send documents for signature. You can choose to add one or more payments or authorizations to your file based on your needs.
You must have a payment gateway enabled to add payments or authorizations to your folder. For more information about the available payment gateways and accepted payment types, see Sertifi Payment Gateways.
Note
You must be a Sertifi Admin+ user to add payments to files. If you need to update your payment settings, you must be a Sertifi Super Admin.
You can also send a folder (without an included signature document) to collect payment or authorization only. For instance, if you already received a signed contract on-site, you can still send the client a file that contains all the payments that the client needs to complete. Additionally, you can also go back and add a payment to a file after you've already created or archived that file.
Adding Payment Requests to Signature Documents
Complete the workflow for preparing a signature document, but do not send the document yet. Refer to Sending a File For Signature; if you're sending a payment, stop at step 6 and come back to this list.
Click Add Payments.
Complete the following fields:
Title - required. Enter a title for the payment. For example, First Deposit.
Type - select Payment.
Amount - required. Enter the payment amount.
Date Due - enter the date the payment is due in ISO format, or a four-digit year, two-digit month, and two-digit day. For example, January 31st, 2022 would be entered as 2022-01-31. Note that this Due Date will more as a date after which reminder emails will be sent to your participants; they will still be able to make a payment after the Due Date entered.
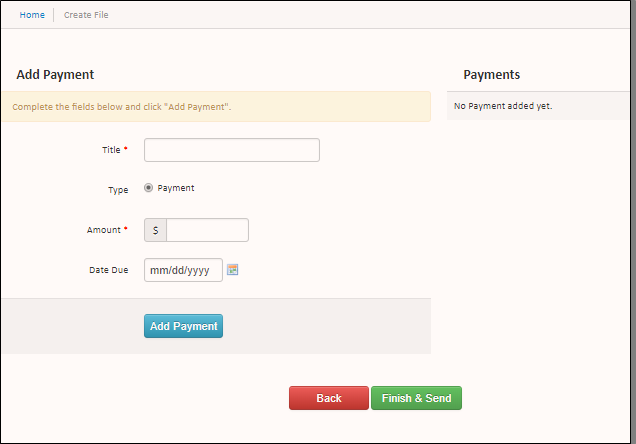
Click Add Payment.
If additional payments are needed, repeat steps 1-4 as necessary.
Click Finish & Send. Your payment requests and signature documents are sent to the client.
Send a Payment Request Without a Signature Document
Complete the workflow for preparing a signature document, but do not upload a document. Refer to Sending a File For Signature; if you're sending a payment, stop at step 4 and come back to this list.
Scroll to the bottom of the page, and then click Add Payments.
Select Payment.
Complete the following required fields:
Title - A title for the payment. For example, First Deposit.
Type - Select Payment.
Amount - The payment amount.
Date Due - enter the date the payment is due in ISO format, or a four-digit year, two-digit month, and two-digit day. For example, January 31st, 2022 would be entered as 2022-01-31.
Click Add Payment.
If additional payments are needed, repeat steps 1-4 as necessary.
Click Finish & Send. Your required payments are sent to the client.
Adding an Authorization Request to Signature Documents
An authorization request is similar to a payment request; the only difference is that authorizations verify that a particular credit card can be charged for goods and services rendered. The exact amount that will be charged to the card will be determined by the customer's actions at your business.
Complete the workflow for preparing a signature document, but do not send the document yet. Refer to Sending a File For Signature; if you're sending an authorization request, stop at step 6 and come back to this list.
Click Add Payments.
Select Authorization.
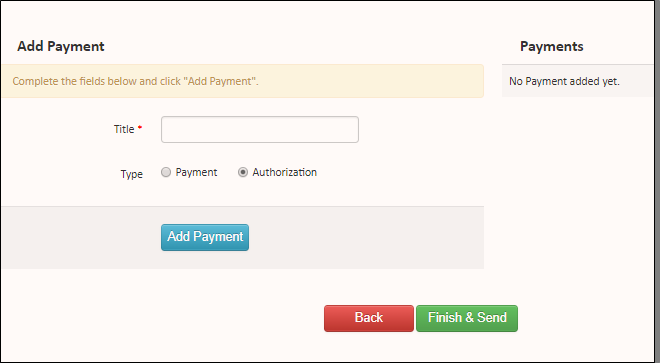
Enter a title for the authorization.
Click Add Payment.
Click Finish & Send. Your required authorization is sent to the client along with the signature documents in the file.
Send an Authorization Request Without a Signature Document
Complete the workflow for preparing a signature document, but do not upload a document. Refer to Sending a File For Signature; if you're sending an authorization request, stop at step 4 and come back to this list.
Scroll to the bottom of the page, and then click Add Payments.
Select Authorization.
Enter a title for the authorization.
Click Add Payment.
Click Finish & Send. Your required authorization is sent to the client.