Sertifi Data Integration
When you install Sertifi for Salesforce Classic or Salesforce Lighting, you can create documents that push and pull data directly from your object records in Salesforce into your documents that you send to clients. This way, your object records are up-to-date with the latest information from your signature documents. You can also add syntax into your or Word of PDF documents to update your object records dynamically.
Note
Sertifi Data Integration is available for any plugin or integration using Salesforce.
To use this integration for your documents:
Determine the Salesforce record fields on the object you want to push and/or pull from.
Gather the field or API names of the Salesforce record fields on the object you want to push and/or pull from.
Enter the syntax for the object data, including the API field name, into the coordinating fillable fields on your PDF document.
This article walks you through a document creation scenario, from locating the field names, to creating your document.
Data Integration scenario
You're creating a document and want to pull in the Account Name and Additional Comments from the Opportunity object directly into your document. You would navigate to the Opportunity object in your Salesforce org, and see what the field names are for Account Name and Additional Comments.
Salesforce Classic: to locate the field names of the Account Name and Additional Comments on your Opportunity object, navigate to Setup > Customize > Name of your Object > Fields.
Salesforce Lightning: to locate the field names of the Account Name and Additional Comments on your Opportunity object, navigate to Setup > Object Manager > Name of your Object in Salesforce Lightning.
For standard fields (fields that are a part of Salesforce out-of-the-box, in this example, Account Name), use the Field Name column.
For Custom Fields (fields that you create, in this example Additional Comments) use the API name column.
You'll see that the corresponding field names are Name and Additional_Comments__c. This is the first piece of information you need to create the proper syntax to add to your document.
Next, you need to determine the syntax you want to use.
Syntax
After locating your field names, you need to determine if you want to:
Only pull information from these fields in Salesforce to populate that information on your document.
Only push information from your document to these fields on the Opportunity object in Salesforce.
Pull and push information from these fields from your document and the Opportunity object in Salesforce.
Then, use the appropriate syntax: Prefix with command to PULL or PUSH_Name of the object.Name of the field.
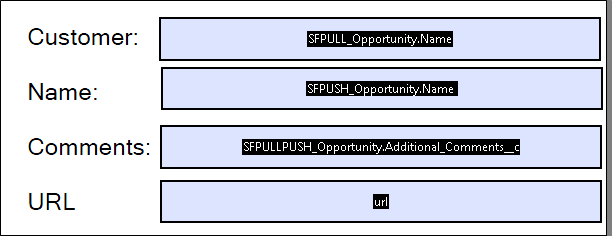
To pull only, append SFPULL_ to pull data from Salesforce into your signature document. In this example, SFPULL_Opportunity.Name and SFPULL_Opportunity.Additional_Comments__c.
To push only, append SFPUSH_ to push data from your signed documents back into Salesforce. In this example, SFPUSH_Opportunity.Name and SFPUSH_Opportunity.Additional_Comments__c.
To push and pull, append SFPULLPUSH_ to pull data from Salesforce int your signature document, and push data from your signed documents back into Salesforce. In this example, SFPULLPUSH_Opportunity.Name and SFPULLPUSH_Opportunity.Additional_Comments__c.
Caution
Ensure your spelling matches the object and opportunity name and that no spaces are included in the syntax, otherwise you'll receive error messages when you attach your document during the Sertifi sending process.
Creating your document
Now that you've determined you want to push the Account Name from your Opportunity object to your document, and you want to pull and push the Additional Comments from your document to your Opportunity object in Salesforce, you can create your document.
You have your syntax, which is: SFPUSH_Opportunity.Name and SFPULL_Opportunity.Additional_Comments__c, so you'll need to add these fields directly to your document.
You can create either a PDF document or Microsoft Word document, however, Sertifi highly recommends creating a PDF document.
Creating a PDF document
To add your syntax to a PDF document, add SFPUSH_Opportunity.Name and SFPULL_Opportunity.Additional_Comments__c to the fields on your document where you want this information to appear. Note that if you're using the Data Integration with Salesforce CPQ, you should use a Word document with text fields.
Creating a Word document
To add your syntax to a Word document, add [[SFLD:SFPUSH_Opportunity.Name:W=150,H=15,R=True]] and [[SFLD:SFPULL_Opportunity.Additional_Comments__c:W=150,H=15,R=True]] to the fields on your document where you want this information to appear. For more information about creating Word documents, see data field parameters and use the syntax with fields you create.
Related objects
You can pull and/or push information from a related object in Salesforce. You can also update your syntax to pull and push this information, but only if the respective Salesforce object is related to your main object by a lookup field.
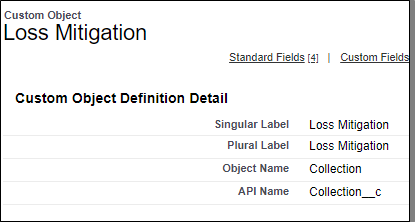
For example, assume you have a custom object called Loss Mitigation and you want to pull the Borrower information from this custom object into your document.
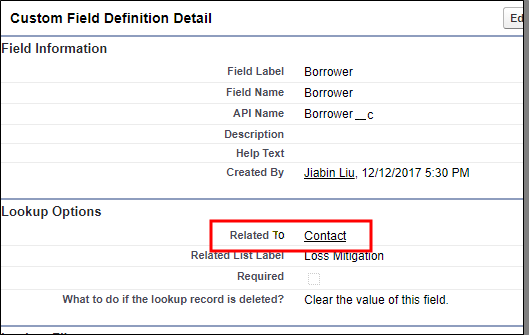
You can click the name of the Borrower object, and see that it's related to the Contact object. Next, you click on the Contact object, and see that you want to pull the Name field from the Contact object.
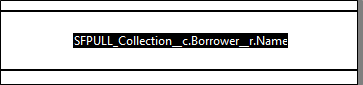
Your resulting syntax appears as SFPULL_Collection__c.Borrower__r.Name. The __r at the end of the related field name denotes that the field is used as a reference. If your lookup field is a custom field, replace __c with __r.
You can also push and pull data from a related object, however, the object must be related to your main object by a lookup field. The format for these fields is: PREFIX_ObjectName.LookupFieldName__r.FieldName.