Send an eAuthorization
Note
Authorizations can only be sent by Admin-level accounts or higher.
Note
If you need to change something about a file you've already sent, you can do so in the File Maintenance page. See the File Maintenance guide for more information.
To send an authorization form to your customer, you must prepare a signature document, and then add an authorization to it.
Log in to your Sertifi portal.
Click Send File from the home screen. The Create File screen opens.
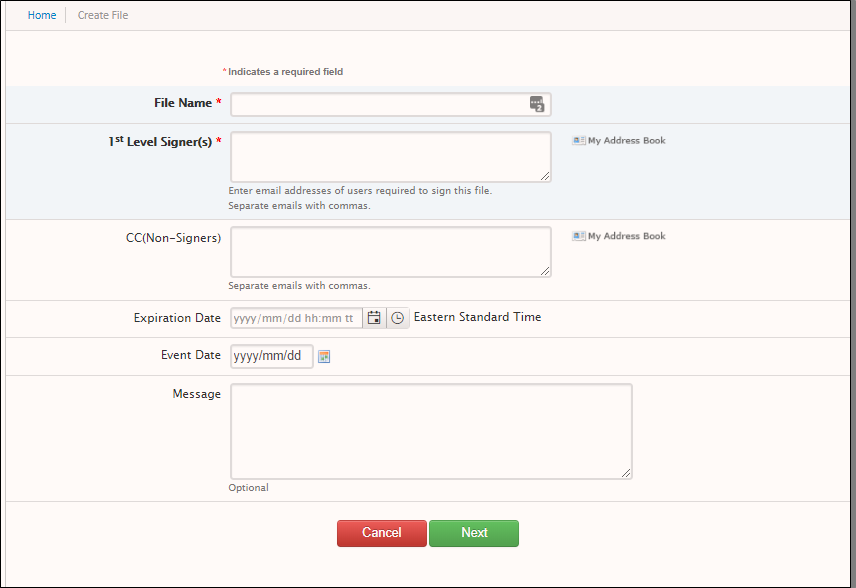
Complete the following fields. Note that each field has a character limit of 100 characters, with the exception of Message.
File Name - enter a unique name for the folder. The file, or folder, will contain the signature and reference documents.
1st Level Signer(s) - enter the email addresses of the users who will sign the documents. You can also click My Address Book to add signers directly from the address book.
CC (Non-Signers) - enter the email addresses of the users that should receive a copy of the documents, but will not be signing themselves.
Expiration Date - select an expiration date and time for the file. If no expiration date is entered, the file will expire after 180 days. You must enter the date in the ISO format of YYYY-MM-DD and the time in HH:MM. The file will then expire at the time specified; however, note that the expiration time is based on your portal's time zone. Thus, if you enter 7:15 p.m. and your portal is set for Eastern time, the file will expire at 7:15 p.m. EST regardless of the time zone your recipients are in.
Message - enter the message you want to appear in the signing room (e.g. "Here is the contract we discussed").
Click Next.
Select the authorization document from the document library.
Caution
Be sure to check the checkbox next to the name of the form in order to include it when you send the file.
Optional – Click Pre-fill Form to complete any fields.
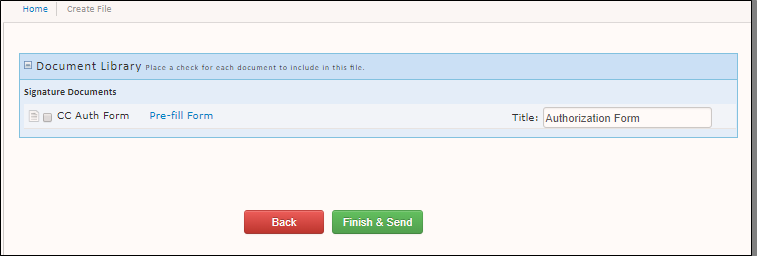
Click Finish & Send.