Dashboard and Getting Started
From the Dashboard page in the Sertifi Embedded Signature Form web application, you can start the process for creating your embedded form and the HTML snippet to add to your website or application.
Tip
Complete the Profile and Portal Setup process before attempting to create an embedded form.
Creating an embedded signature form
To create an embedded form:
Click Get Started from the Dashboard page. The Embedded Signature Form wizard opens.
Configure your Portal & File Information:
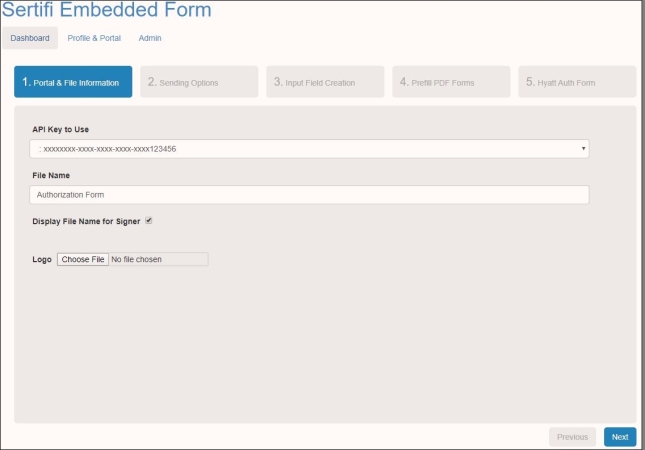
Select the API Key to Use from the dropdown on the first tab of the wizard.
Enter a unique File Name for the form. This name will appear within your Sertifi portal once the form is completed.
Optional – Select a logo to upload for the form.
Click Next.
Configure your Sending Options:
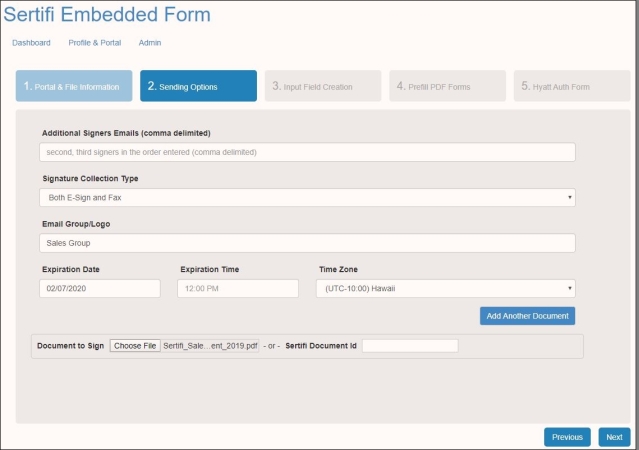
Optional – Enter the email addresses of any additional signers you want to add to the form in a comma delimited list.
Select the Signing type you want to use: either Both E-Sign and Fax or E-Sign only.
Select an Email Group or Logo to use.
Select an Expiration Date, Expiration Time, and Time Zone.
Select either a Document to Sign from your local machine, or enter the API code of the document you want to embed if it already exists in your document library in Sertifi. For more information about locating the API code of a document, refer to the REST API documentation.
Optional – Click Add Another Document to embed another document.
Click Next.
Optional – Configure your Input Fields. The Document Naming tab enables the creation of an additional custom input form to add to your embedded form. From this screen, you can add fields for information you want to collect from the customer. For instance, if you want to collect an Arrival Date that isn't otherwise located on your embedded form, you could add an input field for that information.
To add an input field:
Click Add Input Field.
Enter the Input Field Name. This is the name you want to call the input field.
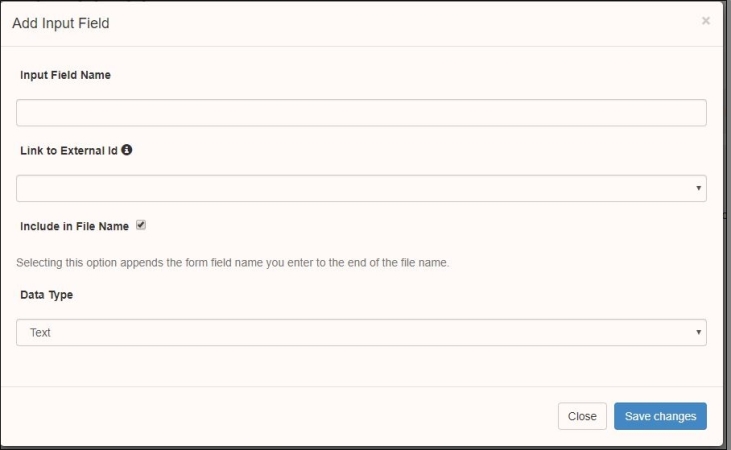
Select Link to External ID to link the field to the respective custom field in your Sertifi portal. For instance, if you use External Id 1 in the Sertifi portal as Arrival Date, you'd select External ID 1 from the dropdown.
Optional – Select Include In File Name to append the Form Field Name to the File Name for the form.
Example: You added the input field Preliminary Offer to the form, and the form itself is named Concert Contract. By enabling this option, the document name will be rendered as "Concert Contract - Preliminary Offer"
Select what Data Type you want to use for the input field.
Click Save Changes.
Click Next.
Optional – Prefill PDF Forms. You can pre-populate a fillable PDF form stored within Sertifi. You must contact Sertifi before you can use this feature.
Click Finish.
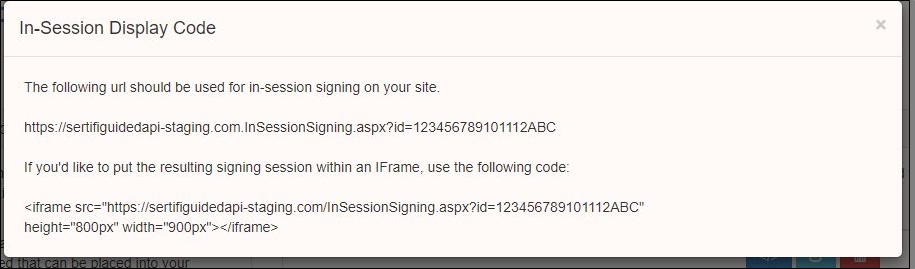
You'll then be taken back to the Dashboard screen, from where you can click to display your Embedded Signature form code. You can either copy the URL for in-session signing in your website or application, or you can copy the
iframecode to use an iframe for the form.